Saturday, February 2, 2013

What is a USB flash drive?

1 comments
http://i1123.photobucket.com/albums/l546/area51reopened/USB.jpg

What is a USB flash drive?
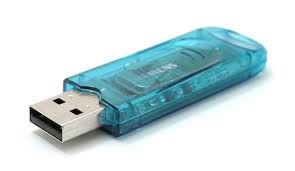
A USB flash drive (UFD) is a compact portable device used to store data. It pairs a
USB (Universal Serial Bus) interface with a flash memory data storage unit. The USB
flash drive is also known as memory stick, key drive, jump drive, or simply USB drive.
The shape typically resembles a human finger or thumb, hence also the name
thumb drive.

Technically, a UFD is not a drive because the flash memory technology is purely
digital, meaning it does not contain any moving parts. Flash memory is non-volatile,
i.e. it does not need power to maintain the stored information. On the one hand,
these characteristics make flash drives less prone to physical damage and on the
other hand they are perfectly silent. The term flash indicates that blocks of data are
erased and reprogrammed in a flash, rather than deleting them one byte at a time.

What is a USB memory stick used for?
The original purpose was to transfer small amounts of data between computers, e.g.
documents or media files. But with the rapid growth of their storage capacity,
alternative ways of using these devices have opened up. People no longer just store
data on flash drives, they also run applications from them, enhance the
performance of their operating system, or boot an entire operating system from the
stick. UFDs can be powerful tools if you know how to use them. This guide focuses on
how you can get the most out of your memory stick to enhance your work.

Before making a purchase, three important characteristics must be considered:
case, capacity, and transfer rate. Last but not least, the price decides which model
offers the best value.

Case:
The case should be durable, provide a hook to attach a lanyard, and most of all,
the shape should not interfere with its use! A massive thumb drive may not fit into a
USB docking station or block surrounding USB ports. Smaller devices will usually fit
anywhere. Besides, they tend to be lighter and easier to carry around.

Capacity:
The latest flash drive model from Kingston can store 256 GB. Affordable models
range from 2 to 16 GB. What size you go for depends on two factors: what is the
intended use and how much can you afford?

Transfer rate:
The transfer rate is the speed at which data can be read from and written to the
flash drive. A USB 2.0 interface should not limit the performance of your flash drive
because it offers more bandwidth than a flash drive can use: up to 60 Mbyte/s (480
Mbit/s). If your computer is fairly old and only supports USB 1.0, you won?t have to
worry about transfer rates. USB 1.0 only does 1.5 Mbyte/s (12 Mbit/s), which is way
below the average read / write speed of even a low performance flash drive.
The read speed typically is higher than the write speed. Thus the write speed is a
limiting factor, especially if you are going to work from and save to your storage
device. Read speeds go up to 34 Mbyte/s (272 Mbit/s), while write speeds reach a
maximum of 28 Mbyte/s (224 Mbit/s).

The maximum read / write speed is dictated by the type of memory. SLC (singlelevel
cell) stores only one bit of data per memory cell, while MLC (multilevel cell)
stores two bits of data per cell. This means that SLC is twice as fast as MLC, yielding
higher read / write speeds. Of course it?s also more expensive. However, it is worth
the investment because with SLC each cell can go through approximately 100,000
cycles of writing and erasing data before failing. Subsequently, SLC lasts about 10
times as long as MLC type memory. Unfortunately, SLC offers less storage space.
http://i1123.photobucket.com/albums/l546/area51reopened/FlashDrive.jpg

What type of flash drive do i need?
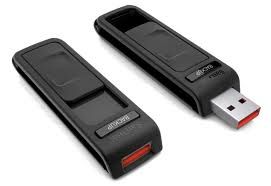
There are four types of flash drives: Generic,High Performance,Secure,and Durable.

Generic
Plastic case, dull design, not very fast, doesn?t come with extra features, and offers
the best price per MB. When you purchase a generic thumb drive from one of the
market leaders, you can still get a high quality product at a very low price.
This kind of thumb drive is sufficient for occasional use, especially if you only need to
transfer data of little importance or data that is always backed up on another drive.

High Performance
Flash drives that carry the label “high performance” are equipped with higherbinned
flash memory chips and better memory controllers, which enable increased
transfer speeds.
If you have a need for speed and are going to use the device on a daily basis, you
should go for high performance. It also means better quality and will last you longer
than a generic model.

Secure
Secure flash drives typically provide hardware encryption via an additional mini
processor. This way the flash drive can maintain better read and write speeds than
generic drives secured with software encryption. The Advanced Encryption
Standard (AES) can encrypt data with up to 256-bit. Access to the data is provided
only after inserting the correct password. Some models even go as far as to self
destruct, i.e. delete all data, after a wrong password was entered several times.
You should opt for a secure flash drive if you frequently deal with sensitive data.

Durable
These flash drives can have any characteristic of the above described, with one
exception: a robust design. They are made to withstand extreme conditions, for
example harsh temperatures, extreme kinetic shock, or high moisture. Durable flash
drives are typically encased in rubber or metal alloy and may also be watertight.
If you tend to carry important data on your flash drive and fear dropping it, throwing
it into the laundry, or damaging it in some other way, you might want to invest in a
durable flash drive.
http://i1123.photobucket.com/albums/l546/area51reopened/cruzer.jpg

Flash Drive
A flash drive is not as sensible as a hard disk, since it has no moving parts. However,
it's still a piece of computer hardware, which can break. Hence, your little storage
device should never be dropped, get wet, be exposed to extreme heat, or be
otherwise maltreated.
Being small comes with its own risks. Like a coin, your thumb drive can disappear
quickly. Try to carry it on a lanyard around your neck or attach it to your keys. You
should in fact treat a flash drive with utmost care, like your external hard drive, and
watch it like the keys to your house.

Formatting
Per default, flash drives are formatted in FAT32. This ensures cross-platform
compatibility. However, FAT32 limits the storable file size to 4 GB. If you would like to
store larger files on your flash drive, you should reformat it to NTFS. This file system is
supported by Windows NT / 2000 and up, Mac (drivers required), and newer Linux
distributions. NTFS is not supported by embedded devices, including TVs and media
players.
If the flash drive will be used on Windows Vista and Windows 7 computers only, I
recommend using the exFAT file format. It was designed for flash drives and ensures
best performance.

Windows XP generally does not support exFAT. A flash drive formatted in exFAT
will simply not be recognized. However, installing update KB955704 (click the
link) from Microsoft will fix this issue.

Before you format, backup any data stored on the drive, including software that
came with it. Then go to > Start > Computer, right-click onto your flash drive and
select > Format… from the menu. In the > Format window select the > File system
(discussed above) and the > Allocation unit size. The latter depends on the average
file size you wish to store. The larger the files you wish to store, the larger the
allocation unit size should be. If you?re unsure, simply go with the default. Click >
Start, confirm your intend to format the flash drive, and wait until formatting has
completed.

To prevent loss of data and extend the life of your storage device, you should
never unplug your thumb drive without first ejecting it through the Windows
taskbar.


To safely remove any USB drive, close drive folders and all files stored on the device,
otherwise Windows will refuse to eject it. Go to the notification area of the taskbar
and look for the USB icon. Left-click the icon and wait for a little window to pop up.
Then click on the device you wish to eject and wait for the confirmation that it is now
safe to remove the hardware.

Should this method fail, i.e. should you receive an error message that the USB mass
storage device could not be removed, try the following steps:
1. Close the device folder and all documents or applications running on the
device.
2. Try ejecting it again.
3. Close all programs that could potentially access the device.
4. Try to eject it again.
5. If you still cannot eject it, reboot Windows and remove the flash drive after
you were logged off.
6. If the issue persists, check whether any installed software on the device
continues to connect to Windows. This could be a portable security or
backup software installed on the device. Check with the software
manufacturer whether this problem is known and how it can be stopped.

Backup and Synchronize Your Files
Essentially, syncing and backing up files is the same. While a backup generally just
works one way, i.e. files on storage device A are copied to storage device B,
syncing can work both ways. Syncing provides more flexibility, as you can select
various settings to copy files just the way you need it.
If you always want to work with the latest versions of your files, no matter which
computer you're currently using, that's when you should sync your files. And if you
never want to lose your files due to a hardware failure, you should always have a
backup. What if you could use just one tool to achieve both?
There are many free tools to backup and sync your files.
*SyncToy
http://www.microsoft.com/download/ [...] x?id=15155

Never Forget Your Flash Drive
If you are working on a public computer, your laptop, or an office computer, don't forget your flash drive when you shut down the computer.
*FlashRecall Free (Never Forget Your USB Flash Drive Again)
http://www.byteboosters.org/flashrecall/index.htm

Encrypt and Password Protect Your Data
In the light of identity theft and stolen data, it is incredibly important to encrypt your
flash drive. In case your flash drive is lost or stolen, it will prevent or at least make
unauthorized access very difficult.
*Truecrypt
http://www.truecrypt.org/

Use Your Thumb Drive to Lock Your PC
Imagine you wouldn?t have to remember a password to efficiently lock your PC.
Instead you had a physical key. Your USB drive can work as a key to lock your
computer.
*PREDATOR PC LOCK Free Edition
http://www.montpellier-informatiqu [...] wnloadFree

Securely Wipe Data From Your Flash Drive
Your USB flash drive may be a temporary tool provided by your employer. Before you
return it, you should thoroughly wipe all data from it. You can of course format the
drive several times. However, it's more secure to use a tool that will overwrite the
deleted files several times. Besides, these tools will allow you to remove only specific
files, while others are left untouched. This will raise less suspicion.
*Disk Redactor Free Edition
http://www.cezeo.com/products/disk-redactor/

Did you know you could increase the system performance of your computer with
the help of a USB thumb drive? You can allocate storage space from your flash drive
to the system for times when your RAM (physical memory) is used to its capacity.
Rather than stashing data on a slow hard drive, Windows can use the much faster
flash memory to read / write data (virtual memory) and free up RAM. This will
considerably enhance the responsiveness of your system.

Windows Vista and Windows 7
The feature is called ReadyBoost. You can access it through the properties menu of
your thumb drive. Go to > Start > Computer and scroll down to > Devices with
Removable Storage. Now right-click onto your thumb drive and select > Properties
from the menu.In the properties window, switch to the > ReadyBoost tab. Here you can either
dedicate the entire device to ReadyBoost or just reserve some space for system
speed. Click > Apply to save the changes and wait as ReadyBoost configures your
cache.

Not all flash drives have the required performance characteristics to work
with ReadyBoost. You will see a respective message if that is the case.


Windows XP
With a slightly different method, you can achieve the same system enhancement in
Windows XP. Here is a brief walkthrough.
Go to > Start and right-click on > My Computer. Select > Properties and switch to the
> Advanced tab. Under > Performance click > Settings… switch to the > Advanced
tab and click > Change…
This last window lists your entire virtual memory. This is where you can allocate
additional space. Select your thumb drive and click > Custom size. Take the number
listed under > Space available and substract 5 MB. Enter the resulting number under
both > Initial size (MB): and > Maximum size (MB).Click > Set and > OK to save your changes, close all other windows, and reboot your
system. Avoid removing the thumb drive to prevent damage.

Windows XP supports a maximum of 4096 MB in additional virtual memory.

A flash drive can be a simple vehicle to transfer data from one computer to
another. With the right tools, however, it can transform into a powerful tool. It can
help you synchronize your work between multiple computers, including your eMails
and user profiles. You can store, encrypt, and always carry important documents on
it, and you can use your memory stick to lock your computer. It?s possible to install
and run applications from a thumb drive. Finally, when your computer slows down
because it needs more RAM, you can extend the virtual memory to your flash drive
and speed up your system.


******* How to use a USB flash drive *******
http://www.wikihow.com/Use-a-USB-Flash-Drive
http://www.ehow.com/how_4778497_us [...] drive.html


USB 3.0 [SuperSpeed]
http://i1123.photobucket.com/albums/l546/area51reopened/USB30.jpg

http://en.wikipedia.org/wiki/USB_3.0
http://www.usb.org/developers/ssusb
http://www.anandtech.com/show/4523 [...] ve-roundup
http://www.everythingusb.com/superspeed-usb.html
http://www.pcworld.com/article/186 [...] rives.html

*Portable Apps for your Flash Drive can found in the links below:
http://www.tomshardware.com/forum/ [...] dated-2011

* LibreKey
http://www.liberkey.com/en.html

* PortableApps
http://portableapps.com/
http://i1123.photobucket.com/albums/l546/area51reopened/FlashDrive-1.jpg


My USB Flash device is write protected

How to remove a write protection from your USB memory Stick if there is no Write protection ON or OFF button or tab:

1. Shutdown your computer or laptop
2. Insert USB Memory Stick into your laptop or Computer
3. Turn on computer and then immediately start pressing (F8) key then Advanced Boot Options screen will come up
4. Select Safe Mode with Command Prompt
5. After loading files if your USB Memory Stick drive letter is (G) for example then write as
6. C:\windows\system32>G: and press enter
7. G:\>format G: and press enter
8. If ask you (Y/N) then press (Y) and press enter
9. Now a full format will start which remove write protection from USB Memory Stick.

Always use the Safely Remove Hardware option when taking your flash drive out of the USB port.This will help prevent data loss and corruption of your flash drive.
***** How To Enable and Disable Write Protection Of USB Devices Under Windows *****
http://www.ghacks.net/2011/03/18/h [...] r-windows/

***** Test for Errors and Fake USB Flash Drives – H2testw *****

http://www.softpedia.com/get/Syste [...] estw.shtml

***** How to Remove Write Protection From a USB Drive *****
http://www.ehow.com/how_4924168_re [...] drive.html

***** How to Remove Write Protection From My USB Flash Drive 2 ******
http://www.ehow.com/how_5809600_re [...] drive.html

***** How to Fix Errors and Format USB Flash Drives *****
http://www.quickonlinetips.com/arc [...] sh-drives/

***** EjectUSB – Safe USB Ejection Tool *****
http://www.pendriveapps.com/ejectu [...] tion-tool/

***** How to Restore a Thumb Drive After Deletion *****
http://www.ehow.com/how_7275528_re [...] etion.html

***** How to Format a USB Flash Drive *****
http://www.supermediastore.com/art [...] ash-memory


Note: Sometimes if you plug a thumb drive back into the USB port and use the Safely Remove Hardware option , the write protection problem will be cured.


USB Thumb Drives that don't have a write protection switch

* Turn on your computer and plug in the thumb drive after your OS has booted into windows.
* Open the My Computer window and find your USB thumb drive.
* Right click on the thumb drive and open the Properties tab. Once the options window opens up, go through the tabs until you see the remove write protection option.
* Select this option and see if that removes the write protection.


If all of the above steps do not work to remove write proection issues, then the drive is likely worn out or broken.A write protection state does occur when a drive has become defective, most often because the drive has been worn out too much. And indicative when all/most data is still there, but the user can't write or format to the drive. < Contributed by forum member psaus


http://i1123.photobucket.com/albums/l546/area51reopened/Speed2.jpg


Software to test the speed of USB Flash \ Thumb Drives


***** CrystalDiskMark *****
http://crystalmark.info/software/C [...] dex-e.html

***** HD TUNE *****

http://www.hdtune.com/

***** Check Flash *****
http://www.softpedia.com/get/Syste [...] lash.shtml

***** UsbFlashSpeed *****
http://usbflashspeed.com/

***** HD Speed *****
http://www.steelbytes.com/?mid=20


http://i1123.photobucket.com/albums/l546/area51reopened/Windows7-2.jpg


Install Windows 7 from a USB flash drive
http://arstechnica.com/business/20 [...] ash-drive/
http://www.howtogeek.com/howto/958 [...] windows-7/
http://wintoflash.com/home/en/


http://i1123.photobucket.com/albums/l546/area51reopened/Windows8-1_zps0f2f36f7.png


How To Install Windows 8 From a USB flash drive
http://pcsupport.about.com/od/wind [...] -8-usb.htm


Warning: Always have another backup of the important data stored on flash drives,because the lifespan of flash drives is unpredictable.

http://i1123.photobucket.com/albums/l546/area51reopened/350px-Usbkey_internals.jpg
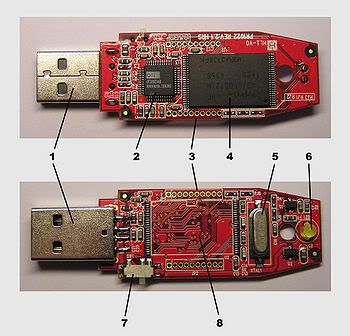
1) USB Standard-A plug
2) USB mass storage controller device
3) Test points
4) Flash memory chip
5) Crystal oscillator
6) LED
7) Write-protect switch (Optional)
8) Space for second flash memory chip


USB Flash Drive Security Warning:
The Microsoft Windows Operating Systems use the AUTORUN.INF file from removable drives in order to know which actions to perform when a new external storage device, such as a USB drive or CD/DVD, is connected to the computer.The problem is that this OS feature, often criticized by the security experts, is used by malicious malware in order to spread by infecting as soon as a new drive is recognized by the computer. The malware does this by copying a malicious executable in the drive and modifying the AUTORUN.INF file so that Windows automatically opens the malicious file as soon as the drive is plugged into the USB port.

***** Bitdefender USB Immunizer *****
http://labs.bitdefender.com/wp-con [...] uncher.exe

***** Vaccinate your computer or Flash Drive with this Free Panda Security Software *****
http://download.cnet.com/Panda-USB [...] 09938.html

***** More great information on Flash Drives in the link below *****
http://en.wikipedia.org/wiki/USB_flash_drive

Sources:wikipedia.org,makeuseof.com,google images,panda security

 http://www.tomshardware.com/forum/272402-32-flash-drive
newer post

Wednesday, February 22, 2012

WordPress best plugin list

1 comments

http://www.webseoanalytics.com/blog/wp-content/uploads/2011/05/wordpress-plugin.jpg

Special thank to Zamil Hossain Sezan for the post. Here is a list of plugins of  Wordpress whth which you can make your blog easy.

1.Related Posts Thumbnails
Customizable plugin, that nicely displays related posts thumbnails under the post.
screenshots
http://wordpress.org/extend/plugins/related-posts-thumbnails/screenshots/
Download link
http://downloads.wordpress.org/plugin/related-posts-thumbnails.1.3.1.zip

2.Facebook Page Publish
"Facebook Page Publish" publishes your blog posts to your Facebook profile or page.
screenshots
http://wordpress.org/extend/plugins/facebook-page-publish/screenshots/
Download link
http://downloads.wordpress.org/plugin/facebook-page-publish.zip

3.Robots Meta
This plugin makes it easy to add the appropriate meta robots tags to your pages, disable unused archives, nofollow unnecessary links as well as do som
screenshots
http://wordpress.org/extend/plugins/robots-meta/screenshots/
Download link
http://downloads.wordpress.org/plugin/robots-meta.3.3.1.zip

4.WProbot
Download
Automatically posting from your feeds
version WPRobot_v2.12,WPRobot_v3,WPRobot_v3.2
http://www.mediafire.com/?ijbpb5v8abeb21o

5.XPandable Author Tab
Simply adds an expanding author bio after every post automatically.
screenshots
http://wordpress.org/extend/plugins/xpandable-author-tab/screenshots/
 Download
http://downloads.wordpress.org/plugin/xpandable-author-tab.zip

5.WP-REPORTPOST
Simple and powerful plugin to make your life easier, Report post plugin to automate links / contents error reporting in your website.
wp-reportpost plugin setup screenshots.
http://wordpress.org/extend/plugins/wp-reportpost/screenshots/
wp-reportpost download plugin link.
http://downloads.wordpress.org/plugin/wp-reportpost.1.2.4.zip

6.wp-super-popup.0.9.6
WP Super Popup makes you able to easily create and manage modal and unblockable popups for your WordPress blog. It is proved that a modal and graphically attractive popup (like the one generated by this plugin) have an high conversion! For example you can use it for creating subscription forms or to promote your product in a viral way. The popup content can be retrieved from an external URL or directly edited inline thanks to a WYSIWYG editor. The most powerful features of this plugin regards its competitors are the following
download plugin link.
http://downloads.wordpress.org/plugin/wp-super-popup.0.9.6.zip

7.White Label CMS
Version: 1.3 Allows customization of dashboard and logos, removal of menus, giving editors access to widgets and menus plus lots more.
screenshots
http://wordpress.org/extend/plugins/white-label-cms/screenshots/
Download
http://downloads.wordpress.org/plugin/white-label-cms.1.3.zip

8.AG Custom Admin
Hide or change items in admin panel. Customize buttons from admin menu. Colorize admin and login page with custom colors.
screenshots
http://wordpress.org/extend/plugins/ag-custom-admin/screenshots/
Download
http://downloads.wordpress.org/plugin/ag-custom-admin.1.2.5.zip

9.Dashboard Editor
With this plugin you can remove sections of the dashboard, add new code, or even add Sidebar Widgets.
screenshots
http://wordpress.org/extend/plugins/wordpress-dashboard-editor/screenshots/
Download
http://downloads.wordpress.org/plugin/wordpress-dashboard-editor.1.1.zip

10.Facebook Page Promoter Lightbox
All your visitors should know about your facebook page and tell their friends. With this plugin you can display a Facebook Page-Like, Light Box
screenshots
http://wordpress.org/extend/plugins/facebook-page-promoter-lightbox/screenshots/
Download 
http://downloads.wordpress.org/plugin/facebook-page-promoter-lightbox.1.1.zip

11.Exploit Scanner
Search the files and database of your WordPress install for signs that may indicate that it has fallen victim to malicious hackers.
screenshots
No photo
Download link
http://downloads.wordpress.org/plugin/exploit-scanner.1.0.5.zip

12.Timthumb Vulnerability Scanner
Scans your wp-content directory for vulnerable instances of timthumb.php, and optionally upgrades them to a safe version.
screenshots
http://wordpress.org/extend/plugins/timthumb-vulnerability-scanner/screenshots/
Download link
http://downloads.wordpress.org/plugin/timthumb-vulnerability-scanner.zip

13.SyntaxHighlighter Evolved
Easily post syntax-highlighted code to your site without having to modify the code at all. As seen on WordPress.com.
screenshots
http://wordpress.org/extend/plugins/syntaxhighlighter/screenshots/
Download link
http://downloads.wordpress.org/plugin/syntaxhighlighter.zip

14.BuddyPress Sliding Login Panel
Adds a sliding AJAX login panel to BuddyPress with a full account center and menu for logged in users.
screenshots
http://wordpress.org/extend/plugins/buddypress-sliding-login-panel/screenshots/
Download link
http://downloads.wordpress.org/plugin/buddypress-sliding-login-panel.1.2.zip

15.Fluency Admin
Give your WordPress admin the Fluency look, Fluency 3.2 is the latest update and is ONLY compatible with WP 3.2.x.
screenshots
http://wordpress.org/extend/plugins/fluency-admin/screenshots/
Download link
http://downloads.wordpress.org/plugin/fluency-admin.3.2.zip

16.Better Author Bio
imply adds a author bio in every post automatically.
screenshots
http://wordpress.org/extend/plugins/better-author-bio/screenshots/
Download link
http://downloads.wordpress.org/plugin/better-author-bio.zip

17.SuperSlider-Login
Slidein login panel, uses mootools 1.2
screenshots
http://wordpress.org/extend/plugins/superslider-login/screenshots/
Download link
http://downloads.wordpress.org/plugin/superslider-login.zip

18.SuperSlider-Show
Animated Gallery slideshow uses Mootools 1.2 javascript replaces wordpress gallery with a slideshow.
screenshots
http://wordpress.org/extend/plugins/superslider-show/screenshots/
Download link
http://downloads.wordpress.org/plugin/superslider-show.2.7.7.zip

19.Slick Social Share Buttons
Slick social share buttons adds facebook, twitter, google +1, google buzz, linkedin, digg, stumbleupon and pinterest pin it social media buttons in a
screenshots
http://wordpress.org/extend/plugins/slick-social-share-buttons/screenshots/
Download link
http://downloads.wordpress.org/plugin/slick-social-share-buttons.2.1.3.zip

20.Smooth Slider
Smooth Slider adds a smooth content and image slideshow with customizable background and slide intervals to any location of your blog
screenshots
http://wordpress.org/extend/plugins/smooth-slider/screenshots/
Download link
http://downloads.wordpress.org/plugin/smooth-slider.2.3.5.zip

21.Post Author Box
A supremely customizable way to add information about the author at the top or bottom of a post, page, or other view.
screenshots
A supremely customizable way to add information about the author at the top or bottom of a post, page, or other view.

Download link
http://downloads.wordpress.org/plugin/post-author-box.1.2.zip

22.Post Avatar
Choose an avatar from a pre-defined list to include in a post.
screenshots
not found

Download link
http://downloads.wordpress.org/plugin/post-avatar.1.4.2.zip

23.Add Local Avatar
This plugin adds the ability to have local avatars in WordPress 2.5+
screenshots
http://wordpress.org/extend/plugins/add-local-avatar/screenshots/
Download link
http://downloads.wordpress.org/plugin/add-local-avatar.zip

24.WP-PageNavi
 Adds a more advanced paging navigation interface.
screenshots
http://wordpress.org/extend/plugins/wp-pagenavi/screenshots/
Download link
http://downloads.wordpress.org/plugin/wp-pagenavi.2.81.zip

25.SEO Auto Links & Related Posts
SEO Auto Links & Related Posts, is a combination of related posts and auto smart links plugin.

screenshots
http://wordpress.org/extend/plugins/seo-alrp/screenshots/

Download link
http://downloads.wordpress.org/plugin/seo-alrp.zip

26.WP-Members
WP-Members™ is a free membership management system for WordPress® that restricts content to registered users.

screenshots
http://wordpress.org/extend/plugins/wp-members/screenshots/

Download link
http://downloads.wordpress.org/plugin/wp-members.2.6.4.zip

27.User Access Manager
With the "User Access Manager"-plugin you can manage the access to your posts, pages and files.
screenshots
http://wordpress.org/extend/plugins/user-access-manager/screenshots/
Download link
http://downloads.wordpress.org/plugin/user-access-manager.1.2.1.zip


28.News-Ticker
Inserts a fading or sliding text banner (ticker) with Posts, Entries or Comments RSS feeds or Images.
screenshots
http://wordpress.org/extend/plugins/news-ticker/screenshots/
Download link
http://downloads.wordpress.org/plugin/news-ticker.2.1.0.zip

29.BackWPup
WordPress Backup and more...
screenshots Database Backup,WordPress XML Export,Optimize Database,Check\Repair Database,File Backup,Backups in zip, tar, tar.gz, tar.bz2 format,Store backup to Folder,Store backup to FTP Server,Store backup to Amazon S3,Store backup to Google Storage,Store backup to Microsoft Azure (Blob),Store backup to RackSpaceCloud,Store backup to DropBoxStore backup to SugarSync,Send Log/Backup by Email,Multisite Support only as Network Admin
screenshots
http://wordpress.org/extend/plugins/backwpup/screenshots/
Download link
http://downloads.wordpress.org/plugin/backwpup.2.1.6.zip

30.some value plugin list
http://www.mediafire.com/?f29vm1bsqb0s3

31.Google Transliteration
Google Transliteration support for WordPress and BuddyPress
This plugin offers Complete language transliteration support for your wordpress blogs in Persian, Tamil, Telugu, Hindi, Malayalam, Kannada, Arabic, Nepali, Marathi, Punjabi, Bengali, Gujarati and Urdu using google transliteration API. Visitors can use Ctrl+G key combination to toggle between english and selected language.

Description
http://wordpress.org/extend/plugins/google-transliteration/
Download
http://downloads.wordpress.org/plugin/google-transliteration.zip


32.WP Limit Posts Automatically
Automatically limit posts by letter, word or paragraph. Options to limit posts in home, category, archive and search.
screenshots
http://wordpress.org/extend/plugins/wp-limit-posts-automatically/screenshots/

Download link
http://downloads.wordpress.org/plugin/wp-limit-posts-automatically.zip

33.BM Custom Login
Customise the wordpress login box quickly and easily
Download link
http://downloads.wordpress.org/plugin/bm-custom-login.zip
Requires WordPress Version: 3 or higher
Compatible up to: 3.2.1
Last Updated: 2011-10-26 Downloads: 198,747

34.admin-only-categories
This simple plugin allow you to hide certains category, choosen in the settings >> admin-only category settings panel, from all but Admin.
Installation
http://wordpress.org/extend/plugins/admin-only-category/installation/
Download link
http://downloads.wordpress.org/plugin/admin-only-category.zip
Requires WordPress Version: 2.8 or higher
Compatible up to: 3.1.4
Last Updated: 2009-2-22 Downloads: 5,005

35.User Access Manager
With the "User Access Manager"-plugin you can manage the access to your posts, pages and files."User Access Manager"-plugin you can manage the access to your posts, pages and files. You only create a user group, put registered users to this and set up the rights for this group. From now on the post/page is only accessible and writable for the specified group. This plugin is useful if you need a member area or a private section at your blog or you want that other people can write at your blog but not everywhere.
Installation
http://wordpress.org/extend/plugins/user-access-manager/installation/
Download link
http://downloads.wordpress.org/plugin/user-access-manager.1.2.1.zip
Requires WordPress Version: 3.0 or higher
Compatible up to: 3.2.1
Last Updated: 2011-10-11 Downloads: 131,201

36.Also review plugins with these tags: Wordpress Total Protect plugin list
http://codex.wordpress.org/User:MichaelH/Plugins/Restriction

37.Wp-Private
Privatize parts of posts from unauthorized users. Begin protected content with [protected] and end hidden content with [/protected].
screenshots
http://wordpress.org/extend/plugins/wp-private/screenshots/
Download link
http://downloads.wordpress.org/plugin/wp-private.1.4.zip
Requires WordPress Version: 3.0 or higher
Compatible up to: 3.1.4
Last Updated: 2010-4-8 Downloads: 11,297

38.WP-Members
WP-Members™ is a plugin to make your WordPress® blog a membership driven site. Perfect for newsletters, private blogs, premium content sites, and more! The plugin restricts selected WP content to be viewable by registered site members. Unlike other registration plugins and WordPress® itself, it puts the registration process inline with your content (and thus your branded theme) instead of the native WP login page. WP-Members™ works "out-of-the-box" with no modifications to your theme, but it is fully scalable for those that want to customize the look and feel, or want to restrict only some content. It is a great tool for sites offering premium content to subscribers, and is adaptable to a variety of applications.
WP-Members™ is a free membership management system for WordPress® that restricts content to registered users.
wp-members
http://wordpress.org/extend/plugins/wp-members/
screenshots
http://wordpress.org/extend/plugins/wp-members/screenshots/
Download link
http://downloads.wordpress.org/plugin/wp-members.2.6.5.zip
Requires WordPress Version: 3.1 or higher
Compatible up to: 3.2.1
Last Updated: 2011-12-8 Downloads: 101,640

39.WP-Cumulus
WP-Cumulus displays your tags and/or categories in 3D by placing them on a rotating sphere.
screenshots
http://wordpress.org/extend/plugins/wp-cumulus/screenshots/
Download link
http://downloads.wordpress.org/plugin/wp-cumulus.1.23.zip
Requires WordPress Version:2.3 or higher
Compatible up to: 2.9.2
Last Updated: 2010-8-18Downloads: 691,941

40.Polldaddy Polls & Ratings
Create and manage Polldaddy polls and ratings from within WordPress.The Polldaddy Polls and Ratings plugin allows you to create and manage polls and ratings from within your WordPress dashboard. You can create polls, choose from 20 different styles for your polls, and view all results for your polls as they come in. All Polldaddy polls are fully customizable, you can set a close date for your poll, create multiple choice polls, choose whether to display the results or keep them private. You can also create your own custom style for your poll. You can even embed the polls you create on other websites. You can collect unlimited votes and create unlimited polls. The new ratings menu allows you to embed ratings into your posts, pages or comments. The rating editor allows you to fully customize you rating. You can also avail of the the 'Top Rated' widget that will allow you to place the widget in your sidebar. This widget will show you the top rated posts, pages and comments today, this week and this month.

screenshots
http://wordpress.org/extend/plugins/polldaddy/screenshots/
Download link
http://downloads.wordpress.org/plugin/polldaddy.2.0.11.zip
Requires WordPress Version: 2.6 or higher
Compatible up to: 3.2.1
Last Updated: 2011-8-5 Downloads: 391,142

41.WP-PostViews
Enables you to display how many times a post/page had been viewed.
  1. Open wp-content/plugins Folder
  2. Put: Folder: wp-postviews
  3. Activate WP-PostViews Plugin
  4. Go to WP-Admin -> Settings -> PostViews to configure the plugin.
Usage
  1. Open wp-content/themes//index.php
  2. You may place it in archive.php, single.php, post.php or page.php also.
  3. Find:
  4. Add Anywhere Below It (The Place You Want The Views To Show):

screenshots
http://wordpress.org/extend/plugins/wp-postviews/screenshots/
Download link
http://downloads.wordpress.org/plugin/wp-postviews.zip

42.Blog Protector - Protect Your Content
Protect your valuable blog content as well as images from getting copied.
Protect your valuable blog content(Pages & Posts) from getting copied. (Please dont forget to give Ratings to Plugin.)
Features
  • Disable right click on your blog
  • Disable selection of text on your blog
You must enable the features from options page to protect your blog.

screenshots
http://wordpress.org/extend/plugins/blog-protector/screenshots/
Download link
http://downloads.wordpress.org/plugin/blog-protector.zip


Requires: 2 or higher
Compatible up to: 3.2.1
Last Updated: 2011-1-6 Downloads: 123,425
Average Rating
(68 ratings)

43.WP Security Scan
WP Security Scan checks your WordPress website/blog for security vulnerabilities and suggests corrective actions such as:
  1. Passwords
  2. File permissions
  3. Database security
  4. Version hiding
  5. WordPress admin protection/security
  6. Removes WP Generator META tag from core code

screenshots
http://wordpress.org/extend/plugins/wp-security-scan/screenshots/
Download link
http://downloads.wordpress.org/plugin/wp-security-scan.zip

Requires: 3.0 or higher
Compatible up to: 3.3
Last Updated: 2011-12-19 Downloads: 856,368
Average Rating
(320 ratings)

44.Weather and Weather Forecast Widget
Get the most beautiful weather info on your WordPress site using Weather Underground or Worldweatheronline!

screenshots
http://wordpress.org/extend/plugins/weather-and-weather-forecast-widget/screenshots/
Download link
http://downloads.wordpress.org/plugin/weather-and-weather-forecast-widget.zip


Requires: 2.8 or higher
Compatible up to: 3.21
Last Updated: 2011-11-24Downloads: 33,223
Average Rating
(19 ratings)


45.WP Hide Post
Enables you to control the visibility of items on your blog by making posts/pages hidden on some parts of your blog, while still visible in other part

screenshots
http://wordpress.org/extend/plugins/wp-hide-post/screenshots/
Download link
http://downloads.wordpress.org/plugin/wp-hide-post.1.1.9.zip


Requires: 2.6 or higher
Compatible up to: 2.9.2
Last Updated: 2010-1-3Downloads: 51,214
Average Rating
(102 ratings


46.Floating Menu
Floating Menu creates a sticky, floating menu widget from any WordPress custom menu using jQuery.Creates a widget, which adds a floating, sticky, drop down menu from any standard WordPress custom menu using jQuery. Can handle multiple floating menus on each page and the location of each menu tab can be easily set from the widget control panel. Menu can also be activated either by 'hover' or 'click'.
screenshots
http://wordpress.org/extend/plugins/floating-menu/screenshots/
Download link
http://downloads.wordpress.org/plugin/floating-menu.1.4.zip


Requires: 3.0 or higher
Compatible up to: 3.1.4
Last Updated: 2011-6-11Downloads: 18,943
Average Rating
(38 ratings)

47.The Hello Bar
Easily add your Hello Bar to your WordPress blog with the official Hello Bar for WordPress plugin.
screenshots
http://wordpress.org/extend/plugins/hellobar/screenshots/
Download link
http://downloads.wordpress.org/plugin/hellobar.zip


Requires: 2.9.0 or higher
Compatible up to: 3.1.4
Last Updated: 2011-5-6Downloads: 5,781
Average Rating
(7 ratings)

48.Yelp Bar
A powerful bar that shows Yelp Rating & Reviews at the top of your WordPress theme, provides instant credibility, fits all designs. A must-have foYelp has become indispensable for anyone that owns a business (regardless if you have a website or not). The Yelp Bar is a very easy & non-intrusive plug-in that shows the Yelp Ratings & Reviews for your business at the top of the page (same as HelloBar, doesn't stick). It provides your business with credibility, as visitors are quickly reassured through the rating & reviews provided by other users.

screenshots
http://wordpress.org/extend/plugins/yelp-bar/screenshots/
Download link
http://downloads.wordpress.org/plugin/yelp-bar.zip

Requires: 3.0 or higher
Compatible up to: 3.2.1
Last Updated: 2011-8-20Downloads: 1,242
Average Rating
(1 ratings)


49.squeeze page plugin

 http://www.filestube.com/s/squeeze+plugin

http://www.moneymakerdiscussion.com/forum/white-hat-download-section/43021-get-wp-squeeze-theme-squeeze-plugin.html

squeeze
http://www.mediafire.com/?n1wm0eitrj5


50.wishlist
WishList Member WordPress Plugin to Convert Your Blog into Membership Site.
http://www.filestube.com/w/wordpress+wishlist
 http://www.mediafire.com/?97k8qh96zh25tpi


51.Bangla Contact Form
"Bangla Contact Form" Creative Bangla Contact Form with attachment support and also include Empty Form validation.
Bangla Contact Form" Creative Bangla Contact Form with attachment support and also include Empty Form validation. after installation then go to your Plugin Editor and findout 'ahrnetwork@gmail.com' and replace it. Now go to addnew page>create new pages>paste this code [contact_form]
Credits
  • Powered by Bangladesh Web Lab Updated for WordPress 3.3.1
Features: * Simple Contact sytems for Your WordPress Blog * Bangla(Unicode)Form * Empty Form Javascripts validation
Plugin by Cx Rana. Need a Web Designer?
Author: Cx Rana

Requires: 2.3 or higherCompatible up to: 3.3.1Last Updated: 2012-1-21Downloads: 20
Average Rating
(1 ratings)

screenshots
http://wordpress.org/extend/plugins/bangla-contact-form/screenshots/

Download link
http://downloads.wordpress.org/plugin/bangla-contact-form.zip


52.Social Login for WordPress
Let your users log in and comment via their accounts with popular ID providers such as Facebook, Google, Twitter, Yahoo, Live, and over 15 more!

screenshots
http://wordpress.org/extend/plugins/loginradius-for-wordpress/screenshots/
Download link
http://downloads.wordpress.org/plugin/loginradius-for-wordpress.2.1.zip

Requires: 2.5.0 or higherCompatible up to: 3.2.1Last Updated: 2012-1-11Downloads: 1,330
Average Rating
(10 ratings)

53.Custom Login
Use this plugin to customize your login screen, great for client sites!
Activate this plugin and customize your WordPress login screen. Use the built-in and easy to use settings page to do the work for you. Theres no need to understand CSS at all! Now featureing a HTML & CSS box for advanced users to up the customization!

screenshots
http://wordpress.org/extend/plugins/custom-login/screenshots/
Download link
http://downloads.wordpress.org/plugin/custom-login.zip


54.Login-box
Login-box inserts into all your pages a "lightbox style" login form, that can be opened with Ctrl + E, making faster the authentication proc
Login-box is a WordPress plugin that inserts into all your pages a login form, making faster the authentication process. As the Login-box is hidden, it doesn’t draws attention of your readers to this part of the blog that doesn’t interest them, but, for you (and the others editors of your blog), becomes quite practical to be opened with a simple combination of keys.
The Login-box presents a visual identical to the default login page of WordPress, but it can be easily modified with themes.

screenshots
http://wordpress.org/extend/plugins/login-box/screenshots/
Download link
http://wordpress.org/extend/plugins/login-box/screenshots/


55.WP Minify
This plugin uses the Minify engine to combine and compress JS and CSS files to improve page load time.
This plugin integrates the Minify engine into your WordPress blog. Once enabled, this plugin will combine and compress JS and CSS files to improve page load time.
How Does it Work?
WP Minify grabs JS/CSS files in your generated WordPress page and passes that list to the Minify engine. The Minify engine then returns a consolidated, minified, and compressed script or style for WP Minify to reference in the WordPress header.

screenshots
http://wordpress.org/extend/plugins/wp-minify/screenshots/
Download link
http://downloads.wordpress.org/plugin/wp-minify.1.1.8.zip

Requires: 2.7 or higherCompatible up to: 3.2.1Last Updated: 2011-9-19Downloads: 216,138
Average Rating (448 ratings)


56.W3 Total Cache

Improve site performance and user experience via caching: browser, page, object, database, minify and content delivery network support.
Recommended by web hosts like: MediaTemple, Host Gator, Page.ly and WP Engine and countless more.
Trusted by countless sites like: stevesouders.com, mattcutts.com, mashable.com, smashingmagazine.com, makeuseof.com, yoast.com, kiss925.com, pearsonified.com, lockergnome.com, johnchow.com, ilovetypography.com, webdesignerdepot.com, css-tricks.com and tens of thousands of others.
W3 Total Cache improves the user experience of your site by improving your server performance, caching every aspect of your site, reducing the download times and providing transparent content delivery network (CDN) integration.

Download link
http://wordpress.org/extend/plugins/w3-total-cache/

Requires: 2.8 or higherCompatible up to: 3.2.1Last Updated: 2011-8-26Downloads: 945,689
Average Rating (2092 ratings)

newer post

Sunday, January 15, 2012

Techified - Just Another Premium Wordpress Themes

0 comments

It’s been a long time I haven’t release new Wordpress Theme. So here it is:
techified
Theme Name: Techified
This theme is suitable for all niche, especially if you want to start a technology related blog such as mobile phones, computer, or notebook reviews.
Features:
- Professional, clean and sleek design
- Tested with latest wordpress version (2.7)
- Animated drop down menu (Powered by Mootools)
- 2 columns
- Animated featured area (Powered by SmoothGallery 2.0)
- banner placement ready (customizable via option page)
- Integrated feedburner email subscribe form
- Custom MyBlogLog Widget
- Compatible with all major browsers
- Option page available to set theme setting (feedburner settings, ads settings, featured list, etc..)
- Valid XHTML Validation
Live Demo & Download:
Installation:
1. Copy the theme file to wordpress theme directory (wp-content/themes/). You can use FTP.
2. From your ftp client, chmod ‘777′ your wordpress uploads folder. This folder should be located at wp-content/uploads. If it doesn’t exist (usually for new wordpress installation), just create a new one.
3. The tc_plugins folder contains an optional plugins used by Techified theme. Copy it to your wordpress plugin directory and activate it accordingly from wordpress admin.
4. Activate Techified theme from wordpress admin
5. Once theme is activated, wordpress will add additional menu - ‘Techified Settings’. Below are instructions for each field:
a. Feedburner uri - Email subscribe uri link. You can find this link under ‘Publicize->Email Subscriptions’ at your feedburner control panel. For example, my email subscribe link is ‘http://feedburner.google.com/fb/a/mailverify?uri=technology/tricks&loc=en_US’, then you just need to put ‘technology/tricks’ in this field.
b. MyBlogLog ID - MyBlogLog provide the visitor tracker for your website. Once you log into your MyBlogLog account and add your website, you can find your website MyBlogLogID at the address bar of your browser or your website MyBlogLog tracking code. See example - mbl
c. Right 300×250 ads code - just put anything there… adsense or whatever ads.
d. For featured posts, just follow the instruction there and you’ll be fine.. But remember the post, 602×245 image and 100×75 image is required.
If you feel lost, you can check out the sample settings for my demo site: techified setting
Bugs and Fixes:
6/14/2009 - Comment display - Fixed
6/16/2009 - WPPageNavi extend button display incorrectly - Fixed
To receive updates on new articles, subscribe to Technology Tricks today.

Post collected from here
newer post

Tuesday, December 27, 2011

Create Folders And Files With NO! Name

0 comments
http://www.instablogsimages.com/images/2009/12/14/make-nameless-folder_G7HvG_25552.jpg


This trick will allow you to create files and folders without any name.

Just follow the following steps:
1.Select any file or folder.
2.Right click on it, press rename or simply press F2.
3.Press and hold the alt key. While holding the Alt key, type numbers 0160 from the numpad.

Note: Type the numbers 0160 from the numpad, that is, the numbers present on the right side of the keyboard. Don’t type the numbers which are present on top of the character keys.

4.Press Enter and the nameless file or folder will be created.

Reason: The file or folder that seems nameless is actually named with a single space.
But what if you want to create another nameless file or folder in the same directory ?
For this you will have to rename the file with 2 spaces. Just follow these steps below:
1.Select file, press F2.
2.Hold alt key and type 0160 from the numpad.
3.Release the alt key. Now without doing anything else, again hold alt key and press 0160.
4.Press enter and you will have second nameless file in the same directory.5.Repeat step 3 to create as many nameless files or folders in the same directory.

(we’ve had a problem with deleting these folders, to do so, start your computer in safe mode and delete it from there.)
newer post

Registry Tweaks to Enhance Your Windows XPerience

0 comments
An example of what the tweaks.reg file should look like
Enlarge picture
You may ask yourselves, why should this article be any different from all those tweaking tutorials around the Internet or, better yet, why should you read this when you can install a program that does it all for you? Here's why: this article will help you make important changes to your system with just two windows opened: this one and a notepad. That's all! No need to click your way through dozens of windows, no need to go through the risk of pushing the wrong button and crashing your operating system.

Furthermore, you don't have to pay a single cent! Why pay for a program to do what you yourselves can do in just a few seconds? And last but not least, you will be able to choose from a list only the tweaks that you're interested in and then apply them on any computer, at any time with just a double-click. Tweaking can hardly get any easier than that! Think how cool that would be, especially after reinstalling Windows.

Let's start by creating the file that will do all the magic. Right-click on your desktop, create a new text document and name it tweaks.reg. Windows will ask if you're sure that you want to change the file extension – click Yes. Right-click the file and choose Edit: a blank notepad window will appear. There are two things you must keep in mind: first of all, for the magic to work your text document must start with 'Windows Registry Editor Version 5.00'. Secondly, later on, be very patient when copying something to paste it in your document. If you copy an incomplete text, the tweak will not work and you might alter other system settings.

As for the pieces of advice that will make your work easier when creating the tweaking file, just keep in mind two things: remember the purpose of each line (you can use comment lines in which you can write whatever you like as long as they start with a semicolon) and, of course, know that there's no problem in leaving a few lines empty between each tweak, to help you differentiate them.

Now here's a list of system tweaks for you to choose from. The idea is quite simple: I'll provide a few lines (the tweak) and a short explanation for what they do. If you're interested in seeing the tweak applied to your computer, all you have to do is paste the lines at the bottom (no, you can't paste them anywhere you like) of your tweaks.reg file.

To make sure I've got your attention, in this article I’ll post optimizations that are either impossible to apply in a conventional way (from Windows Explorer or Control Panel, for example) or possible, but pretty tedious, so getting your hands dirty in less known parts of Windows would normally be necessary in order to apply them.

[HKEY_CURRENT_USER/Software/Microsoft/Windows/CurrentVersion/Policies/Explorer]
"NoLowDiskSpaceChecks"=dword:00000001


It will deactivate the annoying "Low Disk Space" message that appears in your system tray each time one of your drives is almost full.

[HKEY_LOCAL_MACHINE/SOFTWARE/Microsoft/Windows/CurrentVersion/policies/system]
"NoInternetOpenWith"=dword:00000001


This baby will remove the window that always pops up when you try opening a file that is not assigned to a program, asking you if you wish to go online and find out which program you should use to open that type of file. After applying this patch, you’ll see just the Open With window.

[HKEY_CURRENT_USER/Software/Microsoft/Windows/CurrentVersion/Explorer/CabinetState]
"Use Search Asst"="no"


I don't know about you, but I'm a big fan of the old, classic search, without any "assistants." So if you don't like the Windows XP default search interface and prefer the classic from its predecessors, just add these lines to your tweaks.reg file.

[HKEY_CURRENT_USER/Control Panel/Sound]
"Beep"="no"
"ExtendedSounds"="no"


If you haven't got the chance to install a sound driver, you've surely noticed the annoying beeps made by your motherboard each time an alert window pops up. After applying this tweak, you won't need to worry about these beeps anymore.

[HKEY_CLASSES_ROOT/lnkfile]
"IsShortcut"=-
[HKEY_CLASSES_ROOT/piffile]
"IsShortCut"=-


Add this tweak to your list if you don't want your Windows XP to constantly add the shortcut arrow each time you create a shortcut.

[HKEY_CURRENT_USER/Software/Microsoft/Windows/Current/Version/Explorer/Advanced]
"ShowInfoTip"=dword:00000000


If you find the tool tips containing information displayed by Windows when hovering a file with your mouse rather bothersome, adding this optimization to your tweaks.reg file will help you get rid of them.

I'll stop here and be back soon to continue my list with a lot more interesting tweaks in a future article. So all you have to do now is save the contents of the tweaks.reg window, close it and then double-click it. Windows will ask if you wish to add the information stored in tweaks.reg to your registry. If you're sure you've followed each step correctly, go right ahead and press Yes.

In the meantime, if you know any other cool tweaks or had problems creating the tweaks file, just post a comment to this article and have your say.
newer post

Recover Administrator Password in Windows XP

0 comments
If you forget the ADMINISTRATOR Password in Windows XP, You can recover it. You have to follow the steps below:

1. Place your Windows XP CD in your cd-rom and start your computer (it’s assumed here that your XP CD is bootable – as it should be - and that you have your bios set to boot from CD)

2. Keep your eye on the screen messages for booting to your cd Typically, it will be “Press any key to boot from cd”

3. Once you get in, the first screen will indicate that Setup is inspecting your system and loading files.

4. When you get to the Welcome to Setup screen, press ENTER to Setup Windows now

5. The Licensing Agreement comes next - Press F8 to accept it.

6. The next screen is the Setup screen which gives you the option to do a Repair.

It should read something like “If one of the following Windows XP installations is damaged, Setup can try to repair it”

Use the up and down arrow keys to select your XP installation (if you only have one, it should already be selected) and press R to begin the Repair process.

7. Let the Repair run. Setup will now check your disks and then start copying files which can take several minutes.

8. Shortly after the Copying Files stage, you will be required to reboot. (this will happen automatically – you will see a progress bar stating “Your computer will reboot in 15 seconds”

9. During the reboot, do not make the mistake of “pressing any key” to boot from the CD again! Setup will resume automatically with the standard billboard screens and you will notice Installing Windows is highlighted.

10. Keep your eye on the lower left hand side of the screen and when you see the Installing Devices progress bar, press SHIFT + F10. This is the security hole! A command console will now open up giving you the potential for wide access to your system.

11. At the prompt, type NUSRMGR.CPL and press Enter. Voila! You have just gained graphical access to your User Accounts in the Control Panel.

12. Now simply pick the account you need to change and remove or change your password as you prefer. If you want to log on without having to enter your new password, you can type control userpasswords2 at the prompt and choose to log on without being asked for password. After you’ve made your changes close the windows, exit the command box and continue on with the Repair (have your Product key handy).

13. Once the Repair is done, you will be able to log on with your new password (or without a password if you chose not to use one or if you chose not to be asked for a password). Your programs and personalized settings should remain intact.


You also can reset your password using recovery console. Follow the steps of inam ahamed until you got the option for a recovery console.. Once you got a console --- Type the following .... net user YOUR_USER_NAME * Now enter your new password and retype it when prompt.. Reboot and login with new password... (You get the option for recovery console may be after step three for above post)
newer post

TuneUp Utilities | A great Utilities

0 comments
Tuneup Utilities

Usually those who use computer, are familiar with the various utilities. Utilities are used to increase system performance, fixing registry errors, faster defragmenter as well. There are some popular and well-known utilities likes Advance windows care, Super utilities, win turbo, Advance System Care, Maxtor HD utility etc. I used most of them and feel that these are not quite effective like Tune up utilities. TuneUp Utilities contains a lot of features that will fulfill all of your needs and I am sure in future you will not feel the needs of any other utilities. Let me explore the features that TuneUp Utilities has:

TuneUp 1 Click Maintenance:

This is the feature that’s why TuneUp Utilities is the best from other utilities. Just click on the 1 Click Maintenance Tab and let the Utilities do the rest. It will correct your registry problems, free up disk spaces by deleting temporary files; defragment your hard disk if recommended. Even you can make a schedule when TuneUp Utility will automatically maintain your computer. It will also be found at the Maintain Windows button in TuneUp utilities home screen.

Increase Performance:

In this tab there are several very useful function key like TuneUp Drive Defragmenter, TuneUp Startup Manager, TuneUp System Optimizer, TuneUp registry Defragmenter, TuneUp Memory Optimizer.

Free Up Disk Space:

In this tab there are three useful buttons. These are Un-necessary files and Backup, Windows Functions, TuneUp Disk space explorer.

Solve Problems:

In this tab you will find TuneUp undelete, TuneUp disk doctor, TuneUp Repair Wizard.

Customize Windows:

Here you will find TuneUp system control and TuneUp Styler. By using TuneUp styler you can amazingly change the boring Windows default boot and shut down screen by various beautiful TuneUp screens.


Additional Tools:

In this tab TuneUp utilities accumulated lots of functions in some button which are really cool and useful. These are TuneUp process manager, TuneUp shredder, TuneUp registry editor, TuneUp system information, and TuneUp Uninstall manager.


In TuneUp Utilities you will also have a Tab named Rescue Centre which will inform you in your computer what you have changed by this utility and if you want you can even return back to your previous un-optimized PC.
Download TuneUp Utility from here:Click This Link
newer post

How to Rename the Recycle Bin in Windows XP

0 comments
http://static.commentcamarche.net/en.kioskea.net/faq/images/0-fQEKZ4d3-dustbin-thumb-s-.png


To change the name of the Recycle Bin desktop icon, open Regedit and go to:

HKEY_CLASSES_ROOT/CLSID/{645FF040-5081-101B-9F08-00AA002F954E}


and change the name "Recycle Bin" to whatever you want (don't type any quotes).
newer post

How to reduce Computer Shutdown time

0 comments
 http://upload.wikimedia.org/wikipedia/en/5/5e/Windows_XP_Shutdown.png


It is really irritating if computer takes more time to shutdown. Slow Computer Shutdown is the common problems of maximum computer users those who don't know the tricks, how to reduce the shutdown time.

Now i will describe it, what is the reason of slow computer shutdown and how can I boost up a computer shutdown speed.

Reason to shutdown slow:
The computer takes more time to shutting down because it attempts to clear all of the page file which are created during working on PC. Until all of the pages are cleared it compels you to stay freeze. After clearing all of the data it shuts down.

The Trick to reduce the shutdown time:
Click on "Start" and Go to "Run". Write "regedit" in the run box and search. It will take you to the Registry Editor. Here double click on the HKEY_LOCAL_MACHINE. Go to SYSTEM. Then CurrentControlSet. Then Control. Remember, every item is to be opened either double clicking on it or expand sign from the left. In control menu find Session Manager. Then go to Memory Management. Find ClearPageAtShutdown. Now set the value of it to 0 (Zero).
Ok Done! Restart your PC and feel the difference. Hope Computer will take less time to shutdown.
newer post

19 secrets of Windows XP

0 comments
 http://www.softlizer.com/wp-content/uploads/2011/10/xp-secret-programe.jpg


1. It boasts how long it can stay up. Whereas previous versions of Windows were coy about how long they went between boots, XP is positively proud of its stamina. Go to the Command Prompt in the Accessories menu from the All Programs start button option, and then type 'systeminfo'. The computer will produce a lot of useful info, including the uptime. If you want to keep these, type 'systeminfo > info.txt'. This creates a file called info.txt you can look at later with Notepad. (Professional Edition only).

2. You can delete files immediately, without having them move to the Recycle Bin first. Go to the Start menu, select Run... and type ' gpedit.msc'; then select User Configuration, Administrative Templates, Windows Components, Windows Explorer and find the Do not move deleted files to the Recycle Bin setting. Set it. Poking around in gpedit will reveal a great many interface and system options, but take care -- some may stop your computer behaving as you wish. (Professional Edition only).


3. You can lock your XP workstation with two clicks of the mouse. Create a new shortcut on your desktop using a right mouse click, and enter 'rundll32.exe user32.dll,LockWorkStation' in the location field. Give the shortcut a name you like. That's it -- just double click on it and your computer will be locked. And if that's not easy enough, Windows key + L will do the same.

4. XP hides some system software you might want to remove, such as Windows Messenger, but you can tickle it and make it disgorge everything. Using Notepad or Edit, edit the text file /windows/inf/sysoc.inf, search for the word 'hide' and remove it. You can then go to the Add or Remove Programs in the Control Panel, select Add/Remove Windows Components and there will be your prey, exposed and vulnerable.


5. For those skilled in the art of DOS batch files, XP has a number of interesting new commands. These include 'eventcreate' and 'eventtriggers' for creating and watching system events, 'typeperf' for monitoring performance of various subsystems, and 'schtasks' for handling scheduled tasks. As usual, typing the command name followed by /? will give a list of options -- they're all far too baroque to go into here.

6. XP has IP version 6 support -- the next generation of IP. Unfortunately this is more than your ISP has, so you can only experiment with this on your LAN. Type 'ipv6 install' into Run... (it's OK, it won't ruin your existing network setup) and then 'ipv6 /?' at the command line to find out more. If you don't know what IPv6 is, don't worry and don't bother.

7. You can at last get rid of tasks on the computer from the command line by using 'taskkill /pid' and the task number, or just 'tskill' and the process number. Find that out by typing 'tasklist', which will also tell you a lot about what's going on in your system.

8. XP will treat Zip files like folders, which is nice if you've got a fast machine. On slower machines, you can make XP leave zip files well alone by typing 'regsvr32 /u zipfldr.dll' at the command line. If you change your mind later, you can put things back as they were by typing 'regsvr32 zipfldr.dll'.

9. XP has ClearType -- Microsoft's anti-aliasing font display technology -- but doesn't have it enabled by default. It's well worth trying, especially if you were there for DOS and all those years of staring at a screen have given you the eyes of an astigmatic bat. To enable ClearType, right click on the desktop, select Properties, Appearance, Effects, select ClearType from the second drop-down menu and enable the selection. Expect best results on laptop displays. If you want to use ClearType on the Welcome login screen as well, set the registry entry HKEY_USERS/.DEFAULT/Control Panel/Desktop/FontSmoothingType to 2.


10. You can use Remote Assistance to help a friend who's using network address translation (NAT) on a home network, but not automatically. Get your pal to email you a Remote Assistance invitation and edit the file. Under the RCTICKET attribute will be a NAT IP address, like 192.168.1.10. Replace this with your chum's real IP address -- they can find this out by going to

Code: ‹ Select ›
www.whatismyip.com


-- and get them to make sure that they've got port 3389 open on their firewall and forwarded to the errant computer.

11. You can run a program as a different user without logging out and back in again. Right click the icon, select Run As... and enter the user name and password you want to use. This only applies for that run. The trick is particularly useful if you need to have administrative permissions to install a program, which many require. Note that you can have some fun by running programs multiple times on the same system as different users, but this can have unforeseen effects.


This one will create a way to hacking too, if he do mischief Twisted Evil

12. Windows XP can be very insistent about you checking for auto updates, registering a Passport, using Windows Messenger and so on. After a while, the nagging goes away, but if you feel you might slip the bonds of sanity before that point, run Regedit, go to HKEY_CURRENT_USER/Software/Microsoft/Windows/Current Version/Explorer/Advanced and create a DWORD value called EnableBalloonTips with a value of 0.

13. You can start up without needing to enter a user name or password. Select Run... from the start menu and type 'control userpasswords2', which will open the user accounts application. On the Users tab, clear the box for Users Must Enter A User Name And Password To Use This Computer, and click on OK. An Automatically Log On dialog box will appear; enter the user name and password for the account you want to use.

14. Internet Explorer 6 will automatically delete temporary files, but only if you tell it to. Start the browser, select Tools / Internet Options... and Advanced, go down to the Security area and check the box to Empty Temporary Internet Files folder when browser is closed.

15. XP comes with a free Network Activity Light, just in case you can't see the LEDs twinkle on your network card. Right click on My Network Places on the desktop, then select Properties. Right click on the description for your LAN or dial-up connection, select Properties, then check the Show icon in notification area when connected box. You'll now see a tiny network icon on the right of your task bar that glimmers nicely during network traffic.

16. The Start Menu can be leisurely when it decides to appear, but you can speed things along by changing the registry entry HKEY_CURRENT_USER/Control Panel/Desktop/MenuShowDelay from the default 400 to something a little snappier. Like 0.

17. You can rename loads of files at once in Windows Explorer. Highlight a set of files in a window, then right click on one and rename it. All the other files will be renamed to that name, with individual numbers in brackets to distinguish them. Also, in a folder you can arrange icons in alphabetised groups by View, Arrange Icon By... Show In Groups.

18. Windows Media Player will display the cover art for albums as it plays the tracks -- if it found the picture on the Internet when you copied the tracks from the CD. If it didn't, or if you have lots of pre-WMP music files, you can put your own copy of the cover art in the same directory as the tracks. Just call it folder.jpg and Windows Media Player will pick it up and display it.

19. Windows key + Break brings up the System Properties dialogue box; Windows key + D brings up the desktop; Windows key + Tab moves through the taskbar buttons.
newer post
older post

Delete this element to display blogger navbar